

The program Snipping Tool in Windows is a versatile, built-in screenshot utility that lets you capture parts or the entirety of your screen with ease. You can open it quickly (for example, press Windows + Shift + S) and choose a capture mode – free-form, rectangular, window, or full-screen – to grab exactly what you need. Once snipped, the image appears in the Snipping Tool window where you can annotate, save, or share it. As Microsoft explains, “take a snapshot to copy words or images from all or part of your PC screen.
Use Snipping Tool to make changes or notes, then save, and share”. In this guide, we’ll cover the Snipping Tool program’s key features, usage tips (shortcuts, steps), and highlight other programs like Snipping Tool for free download and advanced functionality.
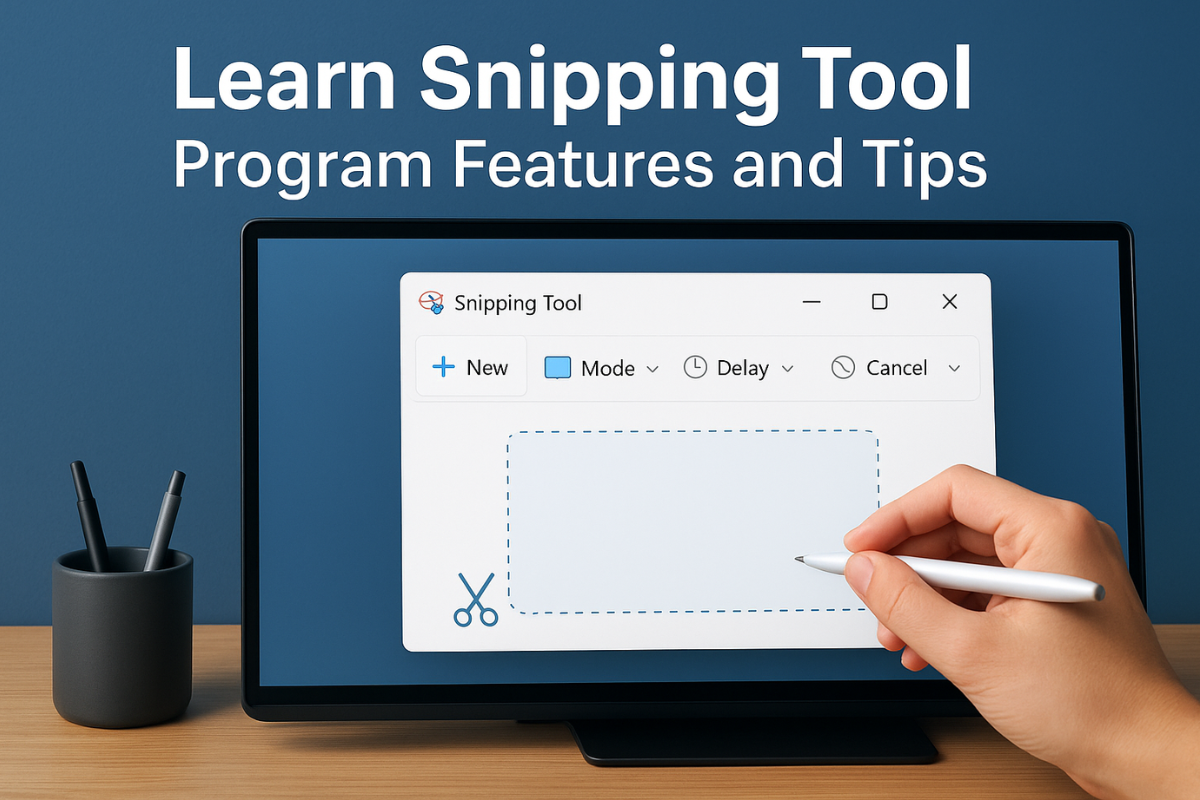
Key Features of the Snipping Tool Program:
The Snipping Tool offers multiple capture modes to suit different needs:
-
Rectangular Snip: Drag to draw a rectangle around the area you want.
-
Free-form Snip: Draw a custom shape around an object to capture irregular regions.
-
Window Snip: Click on a specific window (e.g. a dialog or browser) to capture it.
-
Full-screen Snip: Instantly capture the entire screen.
Additionally, Windows 11’s Snipping Tool can record video clips of a selected screen area (press Win+Shift+R to start recording). This is useful for capturing short tutorials or game highlights. After recording, the video is saved (by default to your Videos\Screen Recordings folder) and can be opened for editing in Clipchamp or another editor.
The Snipping Tool also supports OCR text extraction and quick QR code scanning – simply capture an image containing text or a QR code, then use the Text Actions button to copy the text or scan the code. In short, “the Snipping Tool in Windows 11 is more than just a screenshot tool; it’s a versatile utility for capturing images, recording video, extracting text, and scanning QR codes”.
Additional built-in tools include a Basic Editor: after you snip an image, you can draw (pen/highlight), erase, add shapes/emojis, crop, or even perform text extraction. There’s also a Color Picker (on Copilot+ PCs) for grabbing exact colors from the screen. These features make Snipping Tool ideal for annotating bug reports, creating quick guides, or sharing snippets.
How to Use the Snipping Tool (Steps & Shortcuts)
You can open the Snipping Tool program in several ways. The fastest method is pressing Windows + Shift + S, which immediately dims the screen and shows a small toolbar to choose your capture mode (rectangle, free-form, window, full-screen). Alternatively, search the Start menu for “Snipping Tool” and launch it. Once open, click New and pick your mode. The screen will gray out, letting you draw a snip region. Release the mouse or click to capture. The snip appears in the Snipping Tool where you can edit or save.
-
Step-by-step to capture a screenshot:
-
Press Win + Shift + S (or open Snipping Tool and click New).
-
Select the snip mode (Rectangular, Free-form, Window, or Full-screen).
-
Click or drag on the screen to capture the area.
-
The snip opens in Snipping Tool. Here you can annotate or press Ctrl+S to save the image.
-
-
Keyboard shortcuts: Memorizing a few shortcuts can save time:
-
Win + Shift + S: Open snip toolbar (capture mode selector).
-
Win + Shift + R: Start a video recording snip.
-
Print Screen (PrtSc): By default on Windows 11, this can be remapped to open Snipping Tool via Settings > Accessibility > Keyboard.
-
Ctrl + S: Save the current snip.
-
Ctrl + C: Copy the snip to clipboard for quick pasting into documents.
-
Ctrl + P: Print the snip directly.
-
Esc: Cancel a snip in progress.
(Tip: In Snipping Tool’s menus you can also set a delay timer of 3–10 seconds. This is great for capturing drop-down menus or tooltips.)
-
Tips for Using Snipping Tool Efficiently:
-
Annotate on the spot: Use the Snipping Tool’s drawing tools to add arrows, highlights, or text before saving. This avoids extra editing later.
-
Save by default: Enable “Automatically save screenshots” in Snipping Tool Settings so every capture is saved to Pictures\Screenshots.
-
Copy to Clipboard: By default, snips copy to the clipboard. Paste (Ctrl+V) directly into emails or chat, then save from there if needed.
-
Explore advanced modes: On high-end PCs, try Perfect Screenshot (AI-assisted cropping) or Color Picker (grab hex color from screen) for professional results.
-
Troubleshoot and defaults: If Snipping Tool isn’t working, check Settings > Apps > Default apps and ensure Snipping Tool is set as the default for screenshot protocols.
Snipping Tool Program: Free Download and Installation:
The Snipping Tool program is free and included by default in Windows 10 and 11. No separate download is needed for most users. If you don’t see it, ensure your system is updated (the legacy Snipping Tool was merged with Snip & Sketch in recent updates) or download the app from the Microsoft Store. There are also free downloads for third-party tools (free programs like the Snipping Tool). For example, Greenshot is a free, lightweight screen-capture utility that you can download from its website; it offers a range of features similar to Snipping Tool (region capture, annotating, quick saves).
Alternative Screenshot Programs Similar to Snipping Tool:
If you need features beyond the Snipping Tool program or want cross-platform options, consider these free Snipping Tool alternatives:
-
Screenshot of Greenshot (free screenshot tool). Greenshot: An open-source Windows/Mac tool known for its speed and simplicity. Greenshot lets you capture regions, windows, or full screens, then annotate them. It even uploads images directly to online services like Imgur. Greenshot is free for Windows (and a small fee on Mac).
-
Screenshot of Flameshot (open-source screenshot program). Flameshot: A Linux/Windows/Mac tool with a modern interface. Flameshot provides robust annotation features and customizable keyboard shortcuts. It’s free and popular among developers for its versatility.
-
ShareX: A powerful free and open-source tool (Windows) with 10+ capture modes (including scrolling capture, which Snipping Tool lacks). ShareX includes advanced editing, automation workflows, and direct uploads to cloud services.
-
Lightshot: A simple, cross-platform snipping utility. Lightshot’s strengths are ease-of-use and online sharing; it quickly generates a sharable link for your screenshot.
-
PicPick: Combines screen capture with design tools (ruler, color picker, protractor). Good for designers, it’s free for personal use.
-
Snagit (Paid): For professionals, Snagit offers scrolling captures, templates, and a full editing suite. It’s a paid solution for enterprises that want more than basic snips.
Each of these programs like Snipping Tool can be free downloaded (apart from Snagit) and used as an alternative on your PC. In fact, many Windows users rely on Greenshot or ShareX because they add features like automatic file naming, scrolling screenshots, or instant cloud syncing.
Managing Default Snipping Tool Settings:
In Windows Settings under Apps > Default apps, you can control how the Snipping Tool handles screenshot shortcuts. For instance, you may assign the Print Screen key to open the Snipping Tool. One Microsoft support answer recommends checking Settings > Apps > Default apps to ensure “Screen Snipping” is set for the ms-screenclip protocol. If Windows routes screenshots to a different app, editing these defaults will restore Snipping Tool as the main screenshot program.
FAQs about Snipping Tool Program:
-
Q: What operating systems have the Snipping Tool?
A: The Snipping Tool comes with Windows Vista, 7, 8, 10, and 11 (with newer Windows versions merging it into the Snip & Sketch app). It’s free and built into Windows, so no extra download is usually needed. -
Q: How do I open the Snipping Tool quickly?
A: Press Win + Shift + S on your keyboard. This immediately opens the Snipping Tool overlay for a new capture. You can also search for “Snipping Tool” in the Start menu or pin it to your taskbar. -
Q: Can I save screenshots automatically?
A: Yes. In Snipping Tool’s Settings, enable “Automatically save screenshots”. Then every snip is saved to your Screenshots folder (usually under Pictures) and copied to the clipboard. This ensures you never lose a capture. -
Q: Are there free programs like the Snipping Tool?
A: Absolutely. Programs like Greenshot, ShareX, and Lightshot are all free screenshot tools similar to Snipping Tool. Greenshot and ShareX are open-source; they offer more advanced options (e.g. scrolling capture, cloud uploads). -
Q: How can I capture a delayed screenshot?
A: In Snipping Tool, choose Delay before capturing. You can set a 3, 5, or 10-second delay. This lets you open menus or tooltips that would disappear on an instant capture. After the delay, the capture proceeds normally. -
Q: How do I take a scrolling screenshot (full webpage)?
A: The built-in Snipping Tool can’t capture scrolling content. For that, use an alternative like ShareX or Snagit, which have a scrolling capture mode for entire web pages or long documents. -
Q: How do I restore the original Snipping Tool (Windows 7 style)?
A: In Windows 10/11, search “Snipping Tool” and open the app – it may appear as Snip & Sketch. There isn’t a separate download since it’s integrated. If missing, check Settings > Apps or use the Microsoft Store to install “Sniptool” or “Screenshot Snipping Tool” apps as needed.
Conclusion:
The program Snipping Tool is a powerful, free screenshot utility built into Windows. By mastering its features (capture modes, annotation, video recording, OCR) and shortcuts (Win+Shift+S/R, custom hotkeys), you can quickly document anything on your screen. If you need more functionality, consider exploring similar free programs like Greenshot and ShareX. In 2025, efficiency matters – so use these tips to turn every snip into a well-crafted communication. Happy screenshotting, and feel free to share your own snipping tips or ask questions in the comments!
