

In today’s digital age, having the right screen recording software is essential for creating engaging tutorial videos. A screen recorder lets you capture everything on your computer or device screen – from software demos to gaming walkthroughs – along with audio and webcam input the business. This guide compares 10 of the best tools for recording tutorials. We cover free and paid solutions, HD screen capture software, webcam recording apps, online recorders, and more. Each recommendation highlights key features like resolution, editing capabilities, platform support, and special use-cases. By the end, you’ll know which screen recorder best fits your needs and how to get started making polished tutorial videos.
Why Screen Recording Software is Essential for Tutorials
Screen recording software is the foundation of any video tutorial or online course. It captures exactly what’s happening on your screen – whether you’re writing code, demonstrating a software feature, or walking through a design – and lets viewers follow along visually. Unlike writing long instructions, a recorded video tutorial combines visual cues with narration to boost understanding. It’s widely used in e-learning, webinars, tech support, and even gaming: the market report notes that screen capture programs are “widely used for creating tutorials, recording gameplay footage, capturing webinars and online meetings, [and] creating instructional videos”.
Moreover, modern screen recorders often include audio capture and webcam integration, so you can add narration or a personal video-in-picture to your tutorial. This makes the content more engaging and professional. For example, many software allow you to record microphone narration and system sounds simultaneously, and even overlay your webcam video on the screen capture. As the global market grows, driven by the surge in online learning and digital content, having a quality screen recorder is no longer optional – it’s a must for educators, YouTubers, and corporate trainers screen recording software.
Key Features to Look For in Tutorial Screen Recorders
When choosing a screen recording tool for tutorials, consider these essential features:
- HD Video Quality: Look for HD screen capture software that can record at 1080p or higher. High-definition recording ensures your tutorial videos look crisp, especially when showing text or detailed visuals. Some top recorders support 4K or even 8K capture for the best clarity.
- Audio Recording: Make sure the software captures both microphone and system audio (internal sounds) so your narration is synchronized with what’s on screen. This is key for step-by-step guides where you explain actions as they happen screen recording software.
- Webcam Integration: For a personal touch, use webcam recording software apps that embed your camera feed (picture-in-picture) into the video. This helps build viewer trust and engagement, as they see the instructor’s face while you demo the screen screen recording software.
- Editing Tools: Built-in editing or annotation tools let you polish your tutorial without switching apps. Many recorders offer trimming, cutting, cursor highlighting, text overlays, or drawing tools. These professional screen capture tools save time by letting you edit right after recording.
- Cross-Platform Support: If you work on multiple OS (Windows, macOS, Linux) or on mobile, a cross-platform recording software is valuable. For example, OBS Studio and Loom run on Windows, Mac, and mobile, so you can capture from any device.
- Lightweight and Easy to Use: Especially for quick tutorial clips, a lightweight screen recording app with a simple interface can be ideal. Some recorders run entirely in your browser (no download needed) or have one-click recording to minimize setup time.
- Output Formats: Check that the recorder exports to common formats (MP4, MOV, AVI, etc.) for easy sharing. Some tools let you directly upload to YouTube or save screen recordings as GIFs or images.
- Free vs. Paid: Many free screen recording tools are quite powerful (like OBS Studio or ShareX), but paid tools often add polished features (advanced editing, no time limits). Balance your budget with needs.
By ensuring your chosen recorder has these capabilities, your tutorial production will be smoother and the end result more polished. The sections below dive into the 10 best screen recorders, noting these and other standout features screen recording software.
Top 10 Screen Recording Software for Tutorials
1. Camtasia (TechSmith) – Professional Editing and Capture Suite
TechSmith’s Camtasia is often cited as the best overall screen recording software. Reviewers note it “stands out as the best screen recorder overall,” praising its ease of use and flawless capture plus robust editing tools. Camtasia is a full video production studio in one: it records your screen in high definition and provides a powerful multi-track editor with drag-and-drop effects, annotations, cursor highlights, and transitions. Key features include:
- HD/4K Recording: Records up to 4K (Ultra HD) and lets you capture system audio and microphone narration.
- Advanced Editing: Multi-track timeline editor, green screen (chroma key), callouts, quizzes, captions, and royalty-free assets.
- Webcam & Audio: Supports webcam overlay, picture-in-picture, and smooth audio recording with noise reduction.
- Integrations: Easy upload to YouTube, Vimeo, or LMS (learning management systems) screen recording software.
While Camtasia is a paid product (around $249 one-time fee), the one-time payment includes a year of upgrades, making it good value for content creators. Its polished interface is great for producing high-quality tutorials, though beginners might find the toolset deep. In short, Camtasia is a professional screen capture tool ideal for course creators, trainers, and YouTubers who want top-notch video and editing in one package screen recording software.
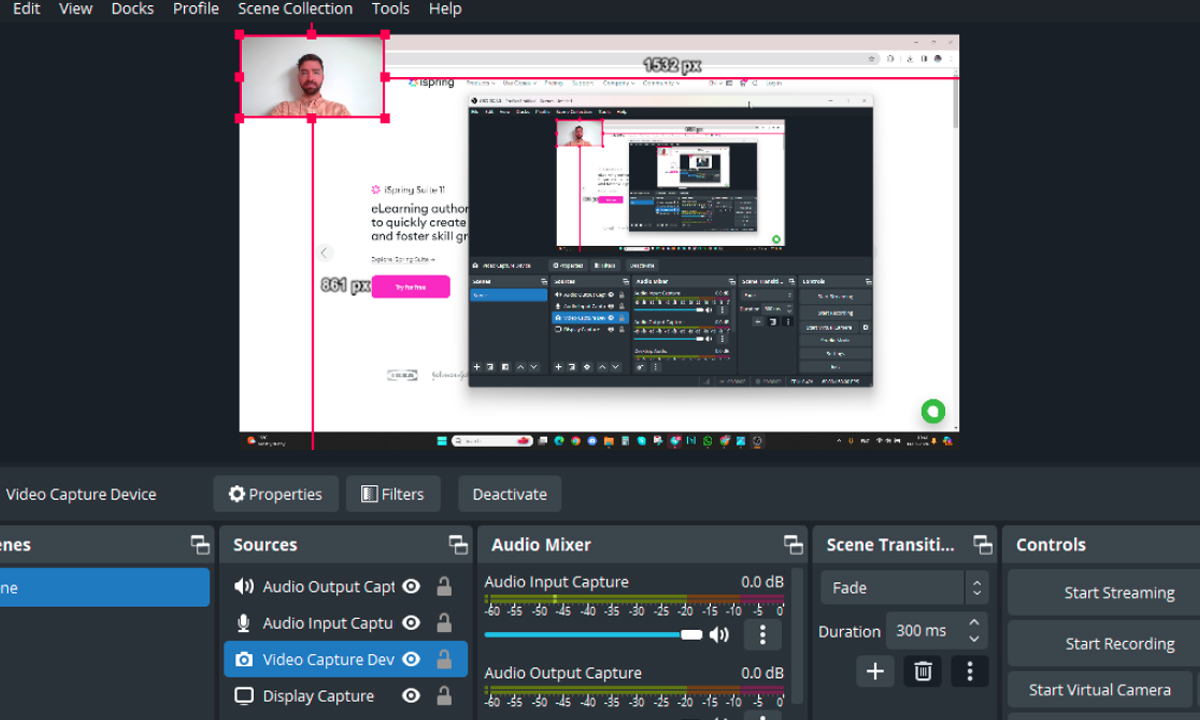
2. OBS Studio – Best Free and Open-Source Recorder
OBS Studio (Open Broadcaster Software) is the go-to free, open-source solution for screen recording and streaming. Available on Windows, Mac, and Linux, OBS lets you capture multiple sources (entire screen, window, browser, game, and webcam) and mix them in real time. It’s extremely versatile:
- Free with No Watermarks: OBS is 100% free with no time limits or watermarks. It’s supported by a large community and plugins.
- Multiple Source Mixing: Combine screen capture, browser windows, images, webcams, and audio sources into complex layouts or scene transitions.
- High Performance: Designed with gamers in mind, it supports game capture mode and hardware encoding (NVIDIA NVENC, etc.) to minimize performance impact.
- Streaming Capable: Also lets you live-stream to YouTube, Twitch, etc., though for tutorial recording you can simply save to MP4 or MKV.
Tech reviewers confirm OBS’s strength: “OBS Studio is our pick for best screen recorder that’s free and open-source… it lets you effortlessly blend different sources and audio tracks together, packing in professional-grade features”. The main downside is the learning curve – beginners may need time to configure settings. However, once set up, OBS delivers HD recordings and even supports 60fps and 4K footage. For anyone on a budget or needing multi-platform support, OBS Studio is unbeatable as a cross-platform recording software and game recording software (free).
3. ScreenPal (Screencast-O-Matic) – Beginner-Friendly Recorder
ScreenPal (formerly Screencast-O-Matic) is designed for simplicity and affordability. It offers an intuitive recording interface ideal for novices. You can capture screen and webcam simultaneously with a single click, and its lightweight editor handles basic cutting, zooming, and annotations. Highlights include:
- Easy Start: One-click capture and a straightforward UI. Users say it “works exactly as you would expect” and is extremely easy to set up screen recording software.
- Free Plan: A free version allows 15-minute recordings (with a watermark); affordable paid tiers remove limits.
- Cross-Platform: Works on Windows, macOS, iOS, Android and even Chromebooks. It syncs projects across devices.
- Built-in Assets: Includes a stock library of music, images, and transitions for quick polish screen recording software.
ScreenPal’s emphasis is on making recording accessible: no technical expertise is needed to create polished content. It includes “smart drawing tools” for neat annotations and a script-to-screen feature for narrating scripted tutorialsemelia.io. Its balance of features and simplicity make it perfect for educators, small business owners, or any beginner who wants to make tutorial videos without a steep learning curveemelia.io.
4. Loom – Instant Cloud Recording and Sharing
Loom is a cloud-based recorder known for its speed and collaboration features. It’s great when you need to make and share quick tutorials without fuss. You can record screen + webcam and immediately upload the video to the cloud, getting a shareable link instantly. Key points:
- Browser & Desktop: Available as a desktop app or Chrome extension (works on Windows, Mac, iOS, Android).
- Instant Sharing: Videos auto-upload to Loom’s cloud with a link, so viewers can watch without downloading files.
- Simple Editing & Branding: Basic trim and callouts, with options for custom thumbnails and company branding.
- Engagement Tools: Viewers can leave emoji reactions and time-stamped comments on Loom videos screen recording software.
According to a user guide, Loom excels at “quick explanations that need feedback without the hassle of holding long video meetings.” It’s tailored for business communications and remote teams. While videos are limited to 720p in free mode, Loom’s strength is speed. You record and share in seconds – ideal for short tutorial clips or asynchronous help. The paid plan (from $12.50/user/month) adds unlimited recording length, AI transcription, and no time limits. Overall, Loom shines for online screen recorder tools where ease of use and instant sharing are priorities screen recording software.
5. Snagit (TechSmith) – Screenshots Plus Basic Recording
TechSmith’s Snagit is best known as a screenshot and image editing tool, but it also offers simple video recording. It’s ideal for creating quick, annotated tutorials or documentation. Snagit’s features include:
- Screenshot Focus: Powerful still capture tools (panoramic capture, text extraction, stamps).
- Video Recording: Records screen and webcam; improvements in recent versions include basic multi-clip editing (stitch clips, highlight cursor).
- Annotations: Rich callout, arrow, and effect libraries to label and emphasize parts of the screen.
- Cross-Platform: Works on Windows and Mac with nearly identical feature sets.
TechRadar notes that Snagit is evolving its recording features: “You can also record your screen, including your webcam…The new features include being able to stitch clips together…and visually highlight your cursor when you click, making it much easier for viewers to see and follow it”. Snagit is not a full video studio like Camtasia, but it is a professional tool for creating instructional content quickly. For example, it has a step-by-step capture mode that automatically numbers images for tutorial guides. If your tutorials need lots of annotated screenshots and short screen clips, Snagit delivers a streamlined workflow. At around $63 (one-time), it’s a budget-friendly option for technical writers, educators, and support staff who want quick captures with annotation.
6. Movavi Screen Recorder – Best Value for Budget-Conscious Creators
Movavi Screen Recorder offers a robust feature set at a competitive price, making it a strong value pick. It strikes a balance between ease-of-use and functionality. Notable features include:
- Recording & Scheduling: Capture full screen, region, webcam, or audio-only. Includes scheduler to start/stop recording at set times (great for unattended demos) screen recording software.
- Effects & Mouse Highlight: Built-in filters to enhance video, mouse click highlighting, and keyboard key overlay to emphasize keystrokes screen recording software.
- Editing Lite: After capture, trim clips, add transitions, and directly upload to YouTube.
- Performance: Efficient capture engine for HD recording; supports direct saving to MP4, MOV, GIF.
According to reviewers, “Movavi continues to offer one of the best value propositions in the screen recording market, delivering a robust feature set at a competitive price point”emelia.io. The 2025 version even adds some premium features like background noise removal and advanced conversion options. In short, Movavi is a solid pick for content creators on a budget – you get many pro-like features (scheduled recording, SuperSpeed conversion) without premium software pricingemelia.io.
7. ScreenFlow – Premium Mac Screen Recorder and Editor
ScreenFlow is a macOS-only recorder known for high-quality output and deep macOS integration. It’s perfect for Apple users who want professional results. Key advantages:
- Mac Optimized: Runs natively on Mac, now with Apple Silicon support for fast performance on new Macsemelia.io.
- Retina & 4K Capture: Records Retina displays at full resolution, ideal for detailed demos on Mac devices.
- Built-in Editor: Powerful multi-track editor with animations, motion graphics, and keyframing – rivaling dedicated video editors.
- Direct Exports: Save to professional formats like ProRes; publish directly to YouTube or Camtasia Cloud.
ScreenFlow “remains the gold standard for Mac users seeking a native screen recording solution”emelia.io. Its interface is elegant and polished, taking advantage of the Mac UI conventions. While it’s $169 (one-time purchase), ScreenFlow offers a lifetime license model, which is appealing for budget-savvy creators. If you record tutorials on Mac, especially complex animated demos or software tutorials, ScreenFlow’s advanced timeline editor and macOS features (Touch Bar support, etc.) make it a standout choice screen recording software.
8. Apowersoft Online Screen Recorder – No-Download Web Tool
Apowersoft Free Online Screen Recorder is a 100% web-based option that requires no app installation (aside from a tiny launcher). This makes it handy if you switch between multiple computers or can’t install software. Highlights:
- Web-Based: Record straight from your browser on Windows or Mac. No login or downloads (just launch a small applet).
- Capture Modes: Full screen, specific window, or browser tab. Also offers audio-only recording for podcasts.
- Output Options: Exports to WMV, MP4, AVI, FLV, and more screen recording software.
- Basic Editing: After recording, you can trim, cut, merge clips, and add simple annotations (like text or shapes).
The online recorder is completely free and very easy to start: just click “Start Recording” on the site and pick your screen or window. One reviewer noted it’s “exceptionally straightforward to use” and produced a good-quality MP4 without any hassle. Keep in mind, however, that Apowersoft’s simplicity means fewer advanced features – for example, it lacks a live cursor highlighter or advanced editing. It’s not ideal for recording high-frame-rate games (browser performance may lag). But for quick online screen recorder tools and one-off tutorials, it’s unmatched. You can then download the video or share it via a link screen recording software.
9. Adobe Captivate – Interactive eLearning Content Creation
Adobe Captivate is a professional eLearning authoring tool with built-in screen recording. It’s tailored for creating interactive training materials, not just simple videos. Important features:
- Interactive Elements: Add quizzes, clickable modules, and branching scenarios directly on top of your screen capture.
- Responsive Content: Create recordings that adapt to different devices (PC, tablet, mobile).
- Captions & Accessibility: Auto-caption videos and ensure compliance with accessibility standards (WCAG).
- LMS Integration: Publish content in SCORM/AICC/TinCan formats for corporate or educational platforms.
Captivate excels when you need more than a passive tutorial video – for example, a self-paced lesson that asks questions and adapts. It has robust recording (full screen, webcam, audio) and then lets you layer in interactivity. One guide notes it “stands above general-purpose alternatives” for education, enabling learners to engage through quizzes and branching pathwaysemelia.io. The tradeoff: Captivate has a steep learning curve and is quite expensive (subscription-based or institutional licensing). But for instructional designers and organizations building formal training, it’s a top-tier choice as an educator-focused screen capture solutionemelia.io.
10. EaseUS RecExperts – High-Resolution Webinar and Game Recorder
EaseUS RecExperts is a versatile recorder that made its mark with ease-of-use and high-resolution output. It’s popular for capturing webinars, meetings, and even gameplay. Key specs:
- 4K/8K Resolution: Supports UHD recording up to 4K and even 8K, ensuring the clearest possible .
- All-in-One Modes: Capture entire screen, a selected window, or a region. You can include your webcam feed in a picture-in-picture layout screen recording software.
- Editing Tools: Offers trimming, cropping, merging clips, adding annotations, filters, and transitions. It even has noise reduction and background blurring for audio screen recording software.
- Scheduler and Recorder: Can schedule recordings, take screenshots, and convert videos.
TechRadar recommends RecExperts for small businesses and notes it can “capture footage at up to 4K/60fps,” making it great for high-fidelity captures. iSpring’s review also highlights its ability to create “UHD screen recordings with 4K or 8K resolution”. The interface is clean and beginner-friendly. EaseUS offers a free version (watermarked, 10-minute limit) and paid tiers (from about $20/month). It doesn’t boast as many advanced editing bells and whistles as some, but it’s straightforward. In summary, RecExperts is ideal for anyone who needs HD screen capture software – be it crisp webinar recordings, software demos, or even game tutorials.
Other Notable Free and Lightweight Screen Recorders
Aside from the top ten above, there are several free or lightweight options worth mentioning:
- ShareX (Windows): A powerful open-source recorder that supports full-screen capture, region capture, and even GIF recording. It includes robust annotation tools and direct upload to many platforms. Great for power users who want custom workflows screen recording software.
- Free Cam (Windows): A simple free recorder (no watermark) with basic editing. Exports in WMV; paid version (Cam Pro) adds MP4 and 1080p, plus webcam. Good for basic tutorial videos without bells and whistl.
- CamStudio (Windows): An old but still-used free recorder. Records AVI with basic codecs. Lightweight but lacks advanced features or editing. Good for quick captures if file size isn’t a concern.
- Screencastify (Chrome Extension): Easy browser-based recorder (free 5-min limit). Records tab or desktop with webcam. Integrates with Google Drive. Handy for quick web-based tutorials.
- Nvidia ShadowPlay / AMD ReLive: Built into graphics drivers, these are free game recorders for PC. They capture gameplay at high quality with minimal lag. Useful if your tutorials involve PC games or GPU-intensive apps.
- Mobile Screen Recording: For on-the-go tutorials, modern phones have built-in recorders (iOS Screen Recording, Android’s feature or AZ Screen Recorder). Apps like AZ Screen Recorder let Android and iOS users record the screen with audio and even overlay webcam screen recording software.
When choosing among these, consider your platform and needs. Free tools often limit resolution, length, or add watermarks. But they can be great for getting started or creating quick demo clips without investment.
How to Choose the Best Screen Recorder for You
To pick the right tool, follow these steps:
- Identify Your Purpose: Are you making software tutorials, game walk-throughs, or team presentations? The best software depends on context (e.g., OBS or Bandicam for gaming; Camtasia or Snagit for tutorials; Loom for quick comms).
- Quality Requirements: Determine desired output quality. If you need HD/4K, ensure the recorder supports it (many free tools are 1080p limited). For training courses, aim for at least 720p, though 1080p is ideal.
- Audio/Video Sources: Will you record narration? Make sure it captures mic and system sound. Need a webcam overlay? Check “webcam recording” capability. If so, tools like OBS, Camtasia, or any with PiP support are needed.
- Editing Needs: If you plan to heavily edit or annotate after recording, choose one with a built-in editor (Camtasia, Captivate) or that exports easily to editing software. Otherwise simple recorders (like QuickTime or ShareX) may suffice with external editing screen recording software.
- Platform Compatibility: Verify it works on your OS. For multi-device teams, cross-platform options (OBS, Loom, Snagit) avoid format headaches. Also consider mobile app support if you’ll switch to a phone or tablet.
- Budget and Licensing: Decide between free vs. paid. Many free screen recording tools (OBS, ShareX, Free Cam) offer core features. Paid software (Camtasia, ScreenFlow, Movavi) adds polish and support. Calculate if a one-time purchase or a subscription makes sense for your frequency of use screen recording software.
- Resources: Check system requirements. Some recorders (especially at high resolutions) can be CPU/GPU intensive. If you have an older PC, a lightweight app (like FlashBack or a lighter recording mode) might be necessary to maintain performance.
By weighing these factors against the features listed above, you’ll narrow down your choices. For example, a teacher might prioritize easy sharing and annotation (leaning toward Loom or Camtasia), whereas a gamer might focus on low-lag capture (favoring OBS or Bandicam). Always test a free trial if available – hands-on experience is the best way to know if a tool fits your workflow.
Frequently Asked Questions
Q: What is the best screen recording software for tutorials?
A: There’s no one-size-fits-all answer, but some top picks are Camtasia (for professional editing and ease), OBS Studio (free, open-source), ScreenPal (beginner-friendly), and Snagit (great for annotated screenshots and clips). According to TechRadar, Camtasia “stands out as the best screen recorder overall”. If budget is tight, OBS Studio is a popular free screen recording tool that works on Windows, Mac, and Linux. For quick, web-based recording, Loom and Apowersoft Online are also excellent screen recording software.
Q: Can I record my screen with audio on my phone?
A: Yes. Modern smartphones have built-in screen recorders (e.g., iOS Control Center’s Screen Recording, or Android’s Screen Record feature). These mobile screen recording apps can capture the device screen and microphone audio. There are also apps like AZ Screen Recorder (Android) and DU Recorder (iOS/Android) that offer more features (bitrate control, front camera overlay, etc.).
Q: How do I capture both system sound and my voice in a recording?
A: When setting up your recorder, enable both “system audio” and “microphone” inputs. Most screen capture software (Camtasia, OBS, ScreenPal, etc.) has checkboxes or menus for these. This way, the program captures the computer’s audio output and your narration together. Some tools even let you record them on separate tracks for easier editing later.
Q: Are there screen recorders that work on Windows, Mac, and Linux?
A: Yes – OBS Studio is one such cross-platform recording software available on Windows, Mac, and Linux. TechSmith’s Snagit and ScreenPal also have Mac and Windows versions. Loom and Screencastify run in browsers (so any OS). If you need maximum compatibility, OBS or a browser-based tool like Apowersoft’s recorder are safe bets screen recording software.
Q: How can I record gameplay tutorials for free?
A: For game recording, OBS Studio is highly recommended. It’s free and optimized for capturing games with minimal lag. It supports recording in high FPS and using GPU acceleration. Also, if you have an NVIDIA or AMD graphics card, their built-in tools (NVIDIA ShadowPlay/GeForce Experience or AMD Radeon ReLive) are free and good for basic capture. Bandicam is another option (Windows only) that excels at compressing game footage (though its free version adds a watermark).
Q: How to get the highest quality recording (HD/4K)?
A: Use a recorder that supports high resolutions – Camtasia, ScreenFlow, or EaseUS RecExperts for instance can capture 4K. Make sure to set your recording resolution to match (e.g. 1920×1080 for 1080p). Close unnecessary programs to maximize performance, and if possible record at a high bitrate. Keep in mind high-res files are larger, so plan for sufficient storage.
Q: Do I need to edit my recording afterwards?
A: For most tutorial purposes, some editing improves the final video. You can trim out mistakes, add transitions, captions, or highlight cursors. Many screen recorders (Camtasia, Movavi, ScreenFlow, EaseUS) include editors, or you can use separate video editing software. Even a simple cut-and-trim can make your tutorial look more professional.
Conclusion
Choosing the right screen recording software for tutorials depends on your specific needs: budget, operating system, desired features, and workflow. This list has highlighted 10 of the best options in 2025, from powerhouse editors like Camtasia and ScreenFlow to free tools like OBS Studio and Loom. Remember to consider factors like HD support, audio capture, webcam integration, and ease-of-use. As one market report observes, the screen capture software market is rapidly growing – in fact, it’s projected to jump from about $9.6 billion in 2024 to $10.8 billion in 2025– reflecting how crucial this technology has become for education and content creation.
Now that you know the top screen recorders, try out a few (many offer free trials or free versions) to find your best fit. Share this guide with friends or colleagues who might need it, and feel free to leave a comment on your favorite screen recording tools. Happy recording and good luck with your tutorials!
Last Post: PDF editing tools
